The Altair Community is migrating to a new platform to provide a better experience for you. In preparation for the migration, the Altair Community is on read-only mode from October 28 - November 6, 2024. Technical support via cases will continue to work as is. For any urgent requests from Students/Faculty members, please submit the form linked here
Using AWS Image ML inside a RapidMiner process
 sgenzer
Administrator, Moderator, Employee-RapidMiner, RapidMiner Certified Analyst, Community Manager, Member, University Professor, PM Moderator Posts: 2,959
I have been needing some good image ML analysis and as many of you know, RapidMiner does not have anything out-of-the-box and the Image Mining extension in the marketplace is, well, dead. So I found a pretty easy way to leverage AWS' Rekognition ML engine to do this as a part of a RM process.
Note that in order to do this, you will need to have Python installed on your computer (google it), an AWS account with an IAM user that has access to AWS Rekognition (google it) + a new S3 bucket for the photos (google it), and lastly, you need to have AWS CLI installed on your computer (yes, google it). I'm just going to focus on how to leverage these tools via RapidMiner...
So the example here is that I have a folder of 200+ photos of people's faces and I want AWS Rekognition to find matches. This is only one of the various things that Rekognition does; you can easily modify what is done here to use other Rekognition functions.
1. Put all your photos in a folder on your local drive. Mine is going to be "photos" on my desktop (yes very original) and a new empty bucket in S3 called "my-rapidminer-photo-bucket".
2. Go to your command line first (before RapidMiner) and create a new AWS Rekognition "collection" like this"
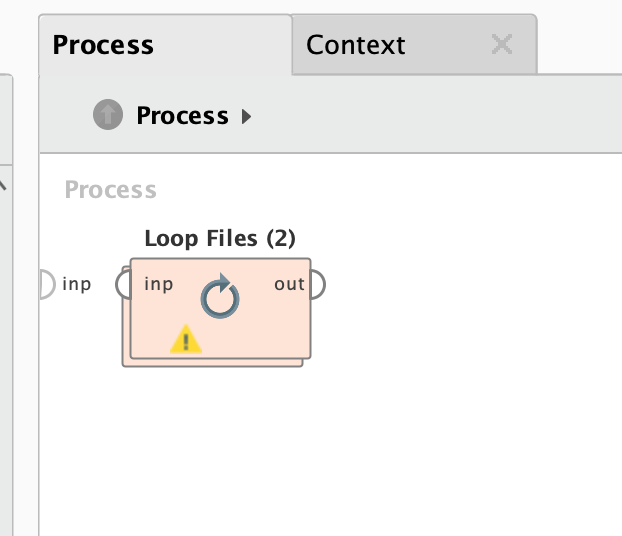
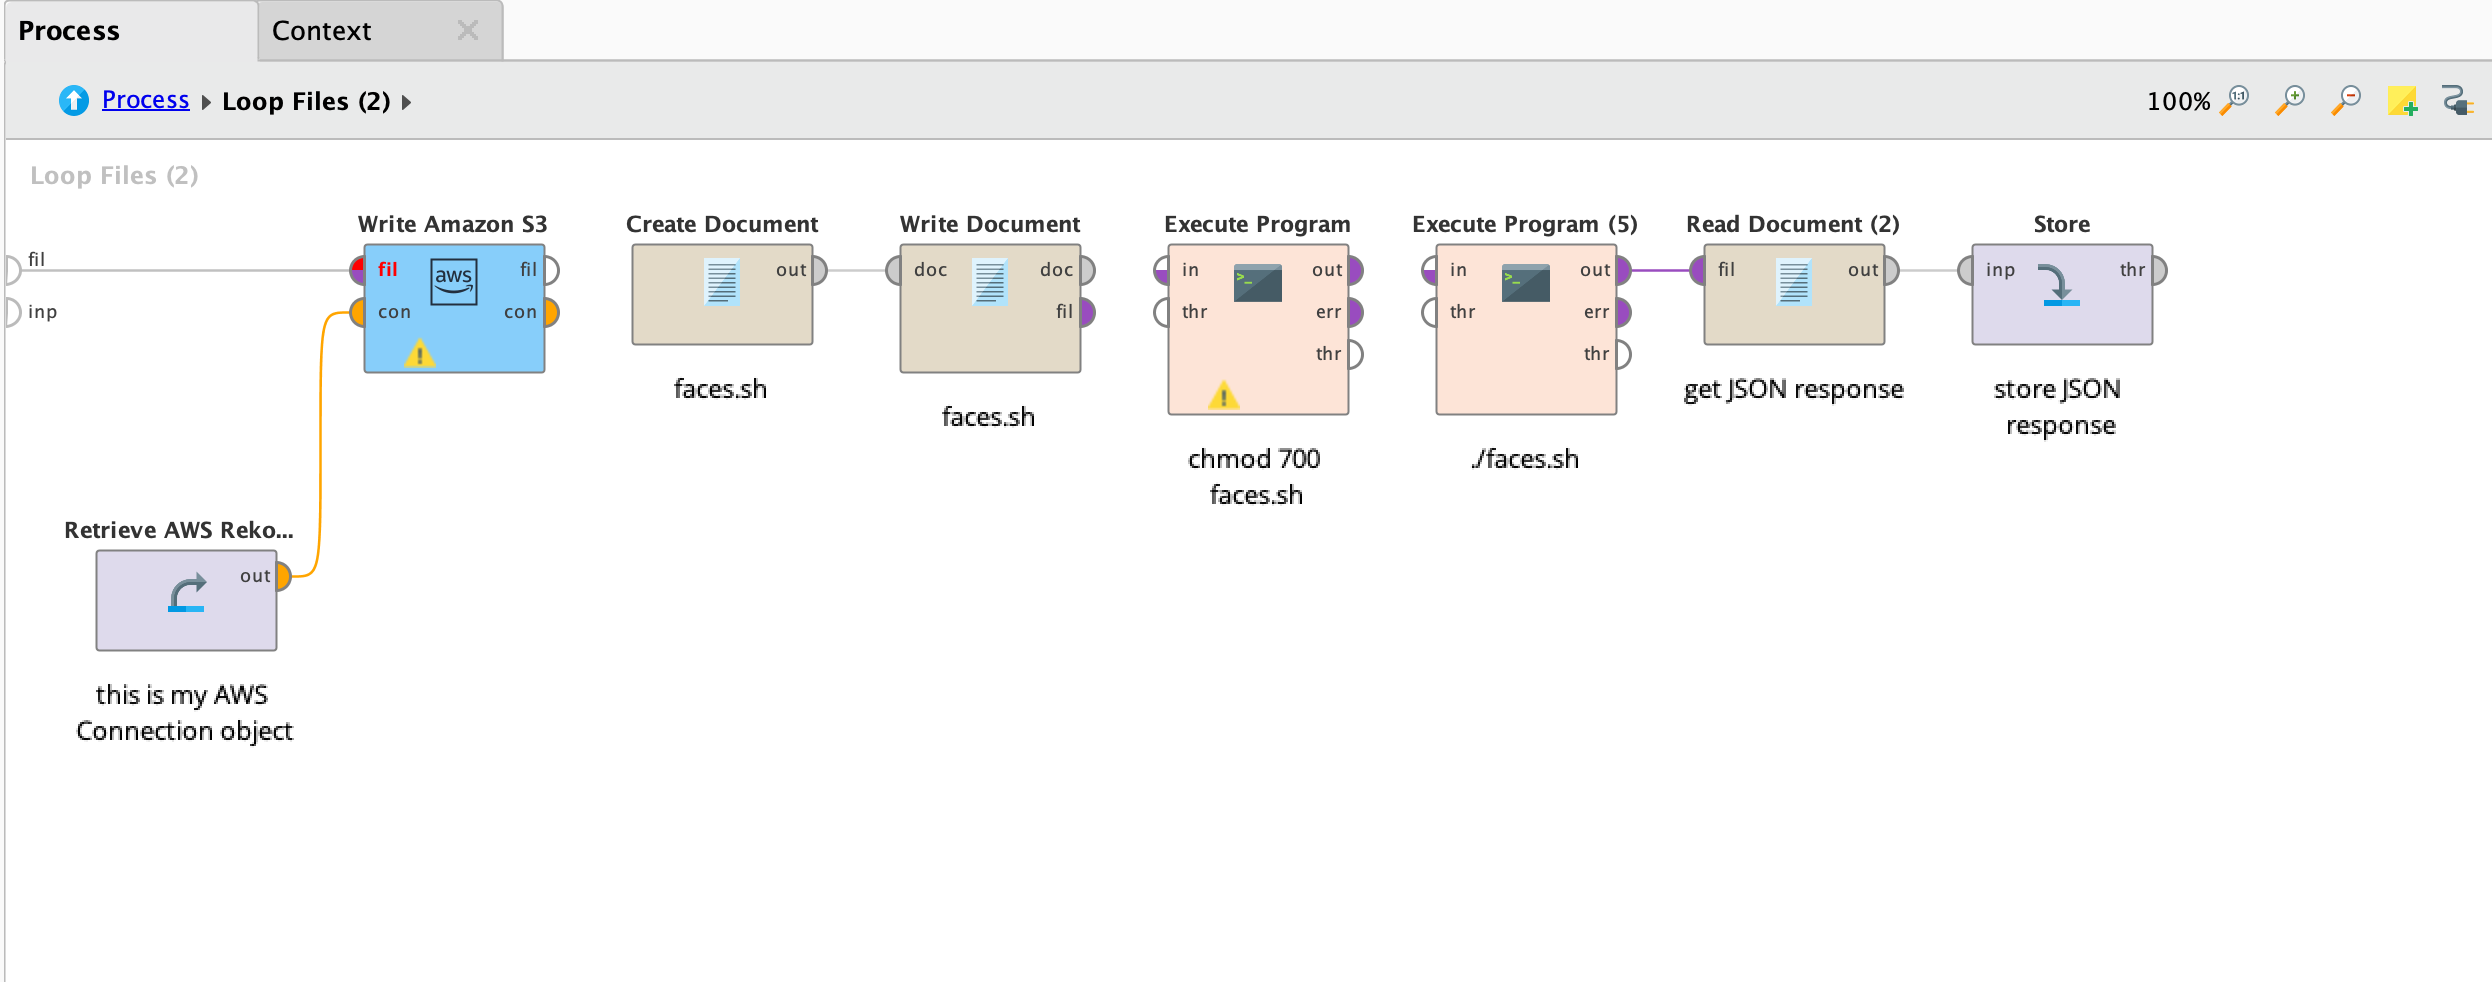
And if everything runs well, you should see a whole set of JSON documents in your repository like this:
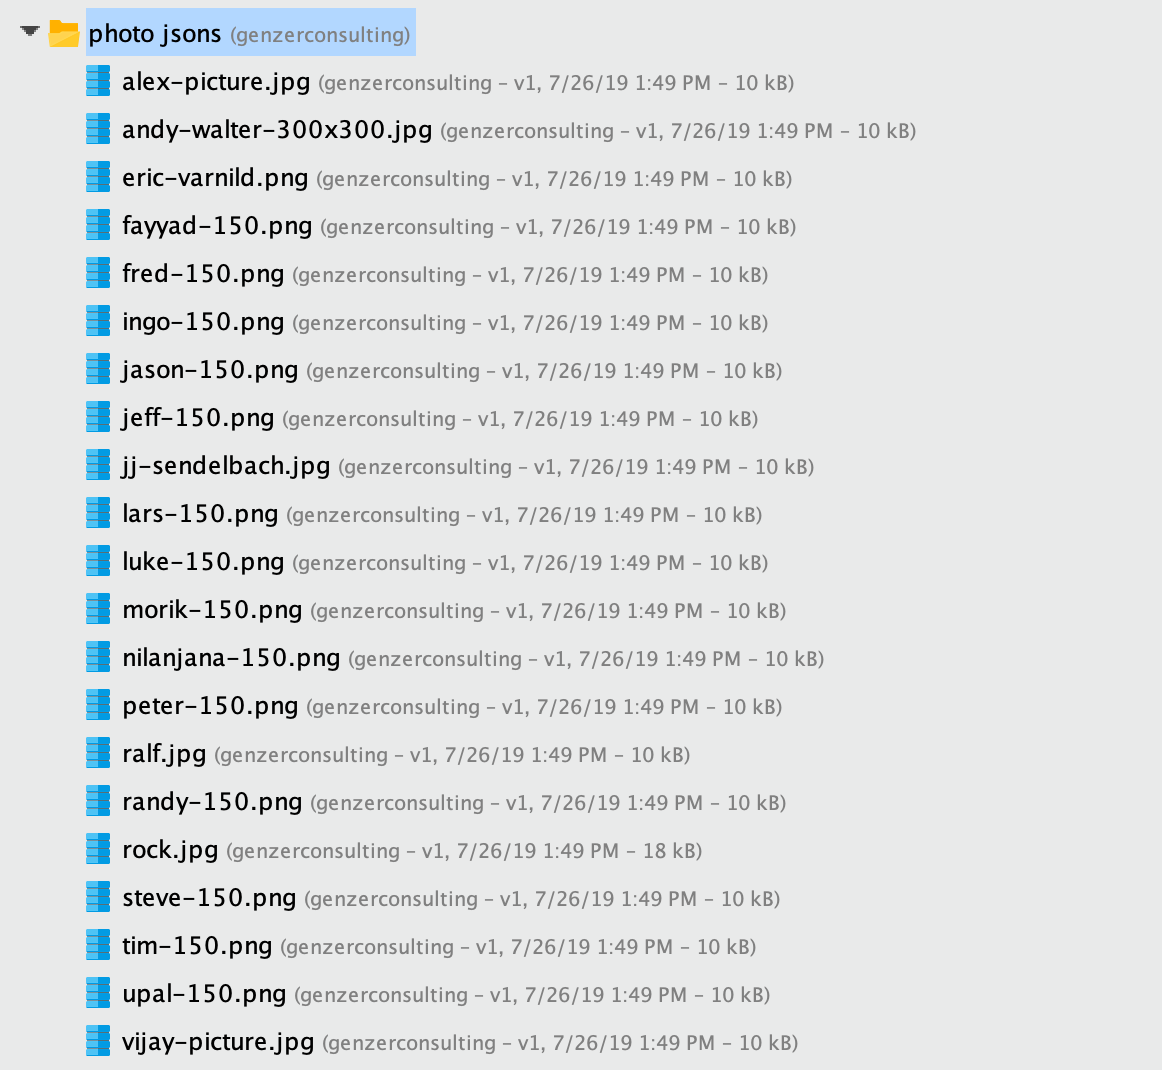
and each one is a JSON document that looks like this:
Note that AWS Rekognition is actually finding all facial features of each photo - relative to the 3-D orientation of the face - which is pretty cool.
[you actually don't need to store the JSONs to do this but I do just to keep them on hand...]
5. Now you just upload a new photo to Rekognition to see if we have any matches:
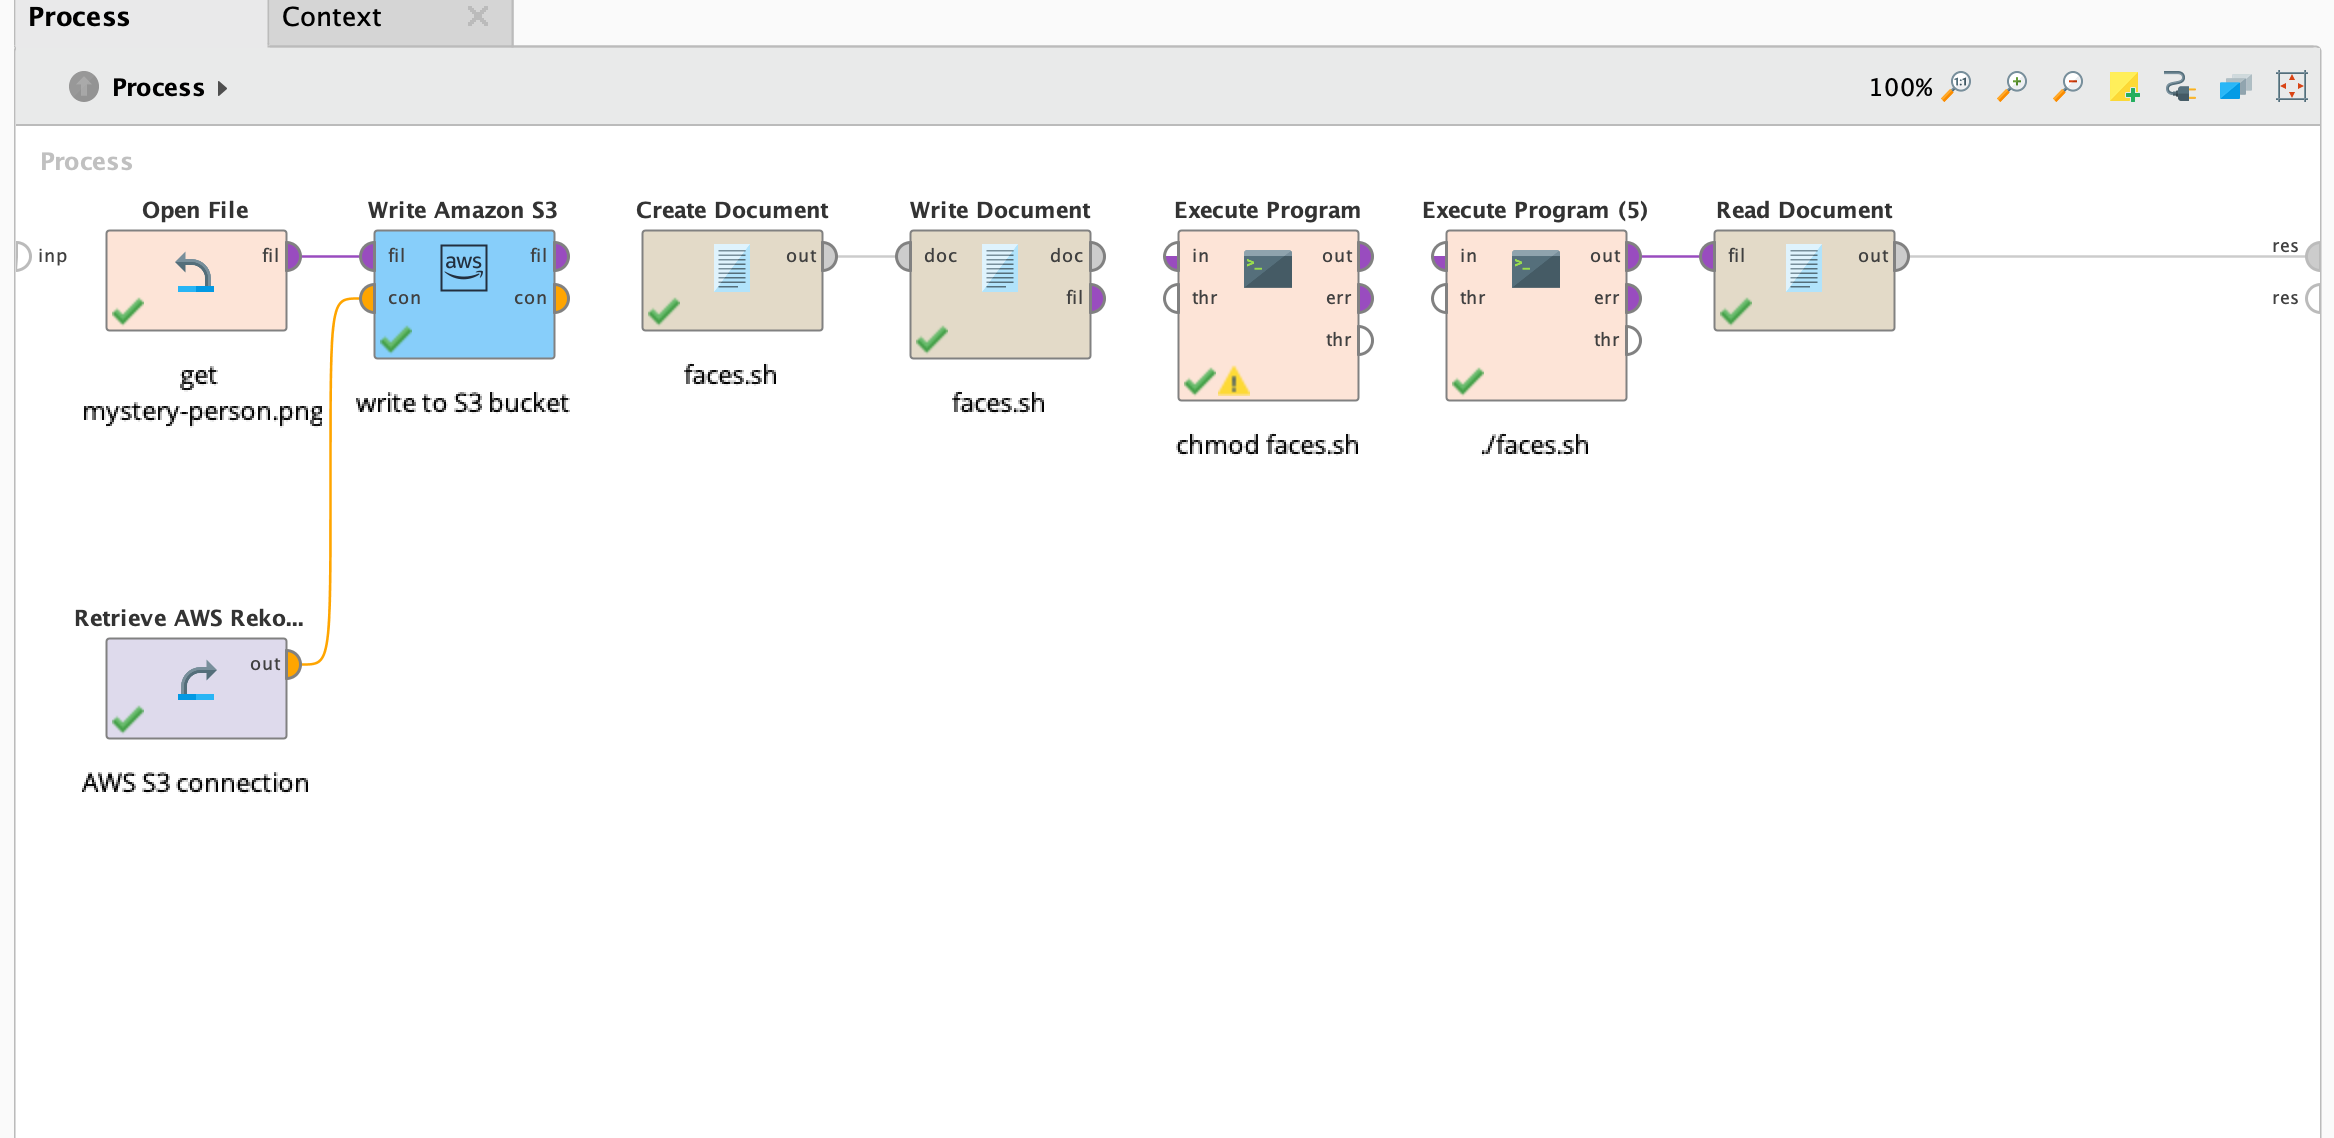
BOOM! As you can see, AWS Face Rekognition correctly identified our fearless leader @IngoRM as the "mystery person" from the collection of images (basically the training set).

The photo of Ingo from the training set
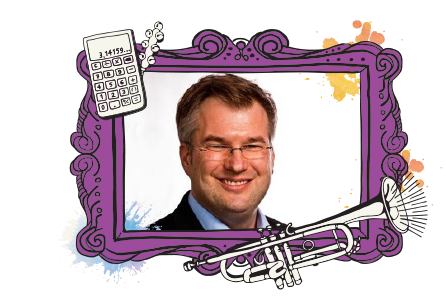
The "mystery photo" of Ingo that was correctly identified by AWS Face Rekognition.
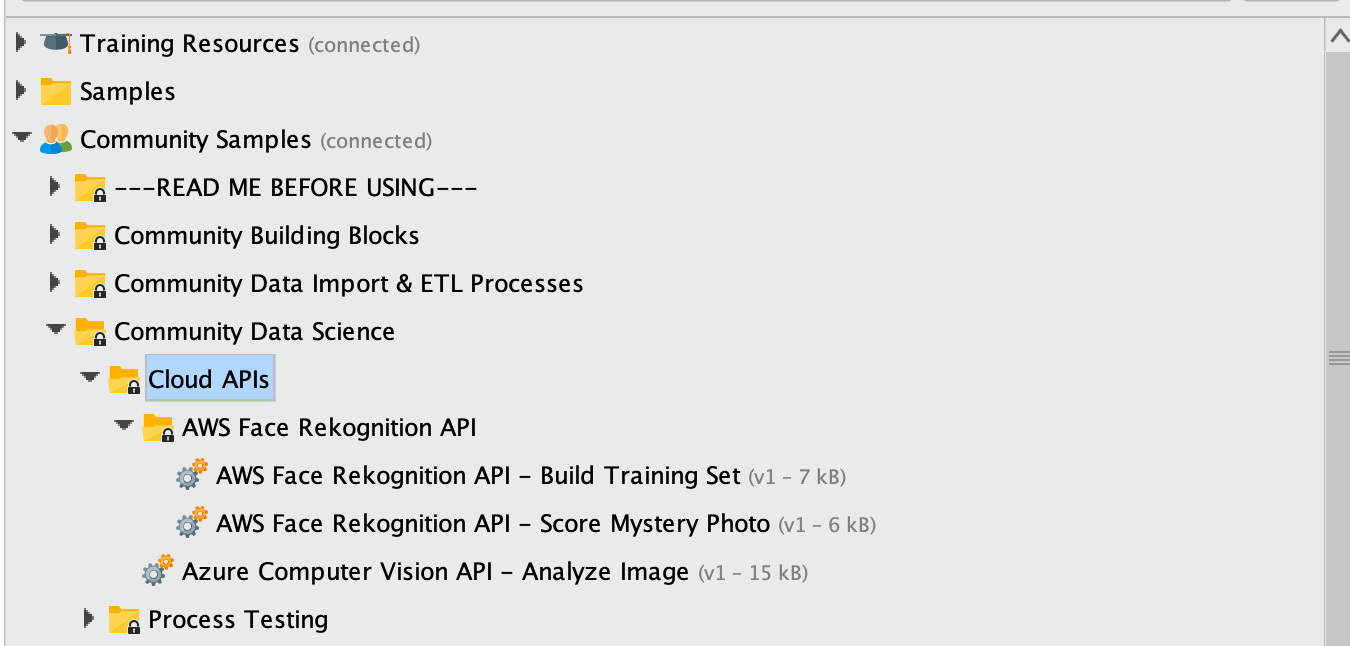
If you want to try it yourself (and you already have RapidMiner Studio), both processes are in the Community Repository.
Have fun!
Scott
Note that in order to do this, you will need to have Python installed on your computer (google it), an AWS account with an IAM user that has access to AWS Rekognition (google it) + a new S3 bucket for the photos (google it), and lastly, you need to have AWS CLI installed on your computer (yes, google it). I'm just going to focus on how to leverage these tools via RapidMiner...
So the example here is that I have a folder of 200+ photos of people's faces and I want AWS Rekognition to find matches. This is only one of the various things that Rekognition does; you can easily modify what is done here to use other Rekognition functions.
1. Put all your photos in a folder on your local drive. Mine is going to be "photos" on my desktop (yes very original) and a new empty bucket in S3 called "my-rapidminer-photo-bucket".
2. Go to your command line first (before RapidMiner) and create a new AWS Rekognition "collection" like this"
{
   "StatusCode": 200,
   "CollectionArn": "aws:rekognition:us-east-1:1234567890:collection/rapidminer-photo-collection",
   "FaceModelVersion": "4.0"
}</code>aws rekognition create-collection --collection-id "rapidminer-photo-collection"</pre>if you do this correctly, you should get a JSON response like this:<br><pre class="CodeBlock"><code>
You don't need to remember the whole collectionArn...all you need is the name which is again "rapidminer-photo-collection" or whatever you want.
If you do NOT get this, you have not set up Python, AWS CLI, or Rekognition correctly - see above.
3. If you don't already have an AWS connection installed, go into RapidMiner Studio 9.3+ and create one by going to Connections -> Create Connection

Enter the info, test the connection, and then click Save (you will need an access key ID and secret key from AWS IAM - google it ![]()


And if everything runs well, you should see a whole set of JSON documents in your repository like this:

and each one is a JSON document that looks like this:
{
"FaceRecords": [
{
"Face": {
"FaceId": "9f2ce8a9-e92a-4b59-89fe-45c4b2799758",
"BoundingBox": {
"Width": 0.3861278295516968,
"Height": 0.5588363409042358,
"Left": 0.2703650891780853,
"Top": 0.23024408519268036
},
"ImageId": "4eef6650-66a6-327f-b273-8af72bfbcd31",
"ExternalImageId": "jeff-150.png",
"Confidence": 100.0
},
"FaceDetail": {
"BoundingBox": {
"Width": 0.3861278295516968,
"Height": 0.5588363409042358,
"Left": 0.2703650891780853,
"Top": 0.23024408519268036
},
"AgeRange": {
"Low": 26,
"High": 43
},
"Smile": {
"Value": true,
"Confidence": 99.98046875
},
"Eyeglasses": {
"Value": false,
"Confidence": 99.97008514404297
},
"Sunglasses": {
"Value": false,
"Confidence": 99.99800109863281
},
"Gender": {
"Value": "Male",
"Confidence": 99.1029052734375
},
"Beard": {
"Value": false,
"Confidence": 98.66301727294922
},
"Mustache": {
"Value": false,
"Confidence": 99.95088195800781
},
"EyesOpen": {
"Value": true,
"Confidence": 99.06494140625
},
"MouthOpen": {
"Value": true,
"Confidence": 99.98346710205078
},
"Emotions": [
{
"Type": "CONFUSED",
"Confidence": 0.5428526997566223
},
{
"Type": "CALM",
"Confidence": 0.05530524253845215
},
{
"Type": "SAD",
"Confidence": 0.1881987452507019
},
{
"Type": "HAPPY",
"Confidence": 98.24203491210938
},
{
"Type": "ANGRY",
"Confidence": 0.3804956078529358
},
{
"Type": "DISGUSTED",
"Confidence": 0.3760184049606323
},
{
"Type": "SURPRISED",
"Confidence": 0.2150907665491104
}
],
"Landmarks": [
{
"Type": "eyeLeft",
"X": 0.3437647521495819,
"Y": 0.4651378095149994
},
{
"Type": "eyeRight",
"X": 0.5177920460700989,
"Y": 0.43634897470474243
},
{
"Type": "mouthLeft",
"X": 0.3916309177875519,
"Y": 0.6354037523269653
},
{
"Type": "mouthRight",
"X": 0.5365059971809387,
"Y": 0.6121758818626404
},
{
"Type": "nose",
"X": 0.43410542607307434,
"Y": 0.5494727492332458
},
{
"Type": "leftEyeBrowLeft",
"X": 0.27506881952285767,
"Y": 0.4329904317855835
},
{
"Type": "leftEyeBrowRight",
"X": 0.3644544184207916,
"Y": 0.4101848006248474
},
{
"Type": "leftEyeBrowUp",
"X": 0.31583666801452637,
"Y": 0.40736645460128784
},
{
"Type": "rightEyeBrowLeft",
"X": 0.46626558899879456,
"Y": 0.39288046956062317
},
{
"Type": "rightEyeBrowRight",
"X": 0.583577573299408,
"Y": 0.38229167461395264
},
{
"Type": "rightEyeBrowUp",
"X": 0.519176185131073,
"Y": 0.3738865256309509
},
{
"Type": "leftEyeLeft",
"X": 0.31687256693840027,
"Y": 0.46678152680397034
},
{
"Type": "leftEyeRight",
"X": 0.37901556491851807,
"Y": 0.45939797163009644
},
{
"Type": "leftEyeUp",
"X": 0.3424757122993469,
"Y": 0.4556279480457306
},
{
"Type": "leftEyeDown",
"X": 0.3470779061317444,
"Y": 0.47103920578956604
},
{
"Type": "rightEyeLeft",
"X": 0.481747567653656,
"Y": 0.4420488774776459
},
{
"Type": "rightEyeRight",
"X": 0.5469238758087158,
"Y": 0.42812928557395935
},
{
"Type": "rightEyeUp",
"X": 0.5130537748336792,
"Y": 0.4269404411315918
},
{
"Type": "rightEyeDown",
"X": 0.5152965188026428,
"Y": 0.442842572927475
},
{
"Type": "noseLeft",
"X": 0.41318249702453613,
"Y": 0.5713274478912354
},
{
"Type": "noseRight",
"X": 0.47815874218940735,
"Y": 0.5588829517364502
},
{
"Type": "mouthUp",
"X": 0.45221784710884094,
"Y": 0.6071081161499023
},
{
"Type": "mouthDown",
"X": 0.46413272619247437,
"Y": 0.6578934788703918
},
{
"Type": "leftPupil",
"X": 0.3437647521495819,
"Y": 0.4651378095149994
},
{
"Type": "rightPupil",
"X": 0.5177920460700989,
"Y": 0.43634897470474243
},
{
"Type": "upperJawlineLeft",
"X": 0.26342642307281494,
"Y": 0.4715827703475952
},
{
"Type": "midJawlineLeft",
"X": 0.3328382074832916,
"Y": 0.6567277312278748
},
{
"Type": "chinBottom",
"X": 0.48781800270080566,
"Y": 0.7458537817001343
},
{
"Type": "midJawlineRight",
"X": 0.6430425047874451,
"Y": 0.6041476130485535
},
{
"Type": "upperJawlineRight",
"X": 0.6498627066612244,
"Y": 0.4060761630535126
}
],
"Pose": {
"Roll": -8.89261245727539,
"Yaw": 5.9243316650390625,
"Pitch": 10.257037162780762
},
"Quality": {
"Brightness": 85.69664001464844,
"Sharpness": 78.64350128173828
},
"Confidence": 100.0
}
}
],
"FaceModelVersion": "4.0",
"UnindexedFaces": []
}Note that AWS Rekognition is actually finding all facial features of each photo - relative to the 3-D orientation of the face - which is pretty cool.
[you actually don't need to store the JSONs to do this but I do just to keep them on hand...]
5. Now you just upload a new photo to Rekognition to see if we have any matches:

{
    "SearchedFaceBoundingBox": {
        "Width": 0.17513641715049744,
        "Height": 0.3737623691558838,
        "Left": 0.4294132590293884,
        "Top": 0.327239990234375
    },
    "SearchedFaceConfidence": 99.99996185302734,
    "FaceMatches": [
        {
            "Similarity": 99.84569549560547,
            "Face": {
                "FaceId": "e530b0db-6e1d-4093-8b40-218c0fa57b91",
                "BoundingBox": {
                    "Width": 0.38082998991012573,
                    "Height": 0.5171380043029785,
                    "Left": 0.3233790099620819,
                    "Top": 0.23423700034618378
                },
                "ImageId": "01f280b9-094f-3671-856b-0f2a6b3748a9",
                "ExternalImageId": "ingo-150.png",
                "Confidence": 100.0
            }
        }
    ],
    "FaceModelVersion": "4.0"
}
BOOM! As you can see, AWS Face Rekognition correctly identified our fearless leader @IngoRM as the "mystery person" from the collection of images (basically the training set).

The photo of Ingo from the training set

The "mystery photo" of Ingo that was correctly identified by AWS Face Rekognition.
If you want to try it yourself (and you already have RapidMiner Studio), both processes are in the Community Repository.

Have fun!
Scott
Tagged:
21


Comments
That was great!
Just a note for Windows users - you need to change the JSON formatting of the --image parameter, and change the line breaks from backslashes (\) to carets (^).
Here is how it goes:
aws rekognition index-faces ^
--image "{\"S3Object\":{\"Bucket\":\"my-rapidminer-photo-bucket\",\"Name\":\"%{file_name}\"}}" ^
--collection-id "rapidminer-photo-collection" ^
--max-faces 1 ^
--quality-filter "AUTO" ^
--detection-attributes "ALL" ^
--external-image-id "%{file_name}"
Regards;