
Compare Faces with AWS Rekognition in RapidMiner Studio
 sgenzer
Administrator, Moderator, Employee-RapidMiner, RapidMiner Certified Analyst, Community Manager, Member, University Professor, PM Moderator Posts: 2,959
sgenzer
Administrator, Moderator, Employee-RapidMiner, RapidMiner Certified Analyst, Community Manager, Member, University Professor, PM Moderator Posts: 2,959  Community Manager
This is a step-by-step guide for anyone to use RapidMiner Studio to leverage the capabilities of AWS Rekognition to compare two face images.
2. Sign into your new AWS account.
[2a. I strongly recommend enabling two-factor authentication at this point for your own protection. You can learn how to do this here.]
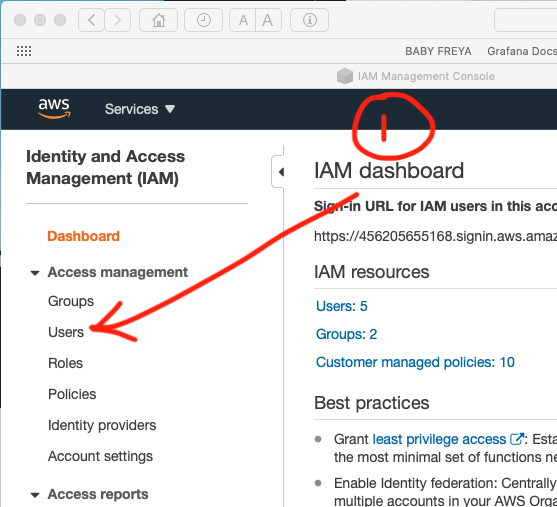
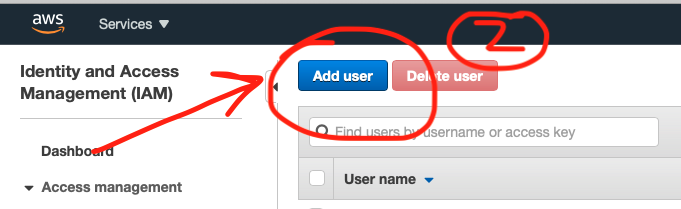
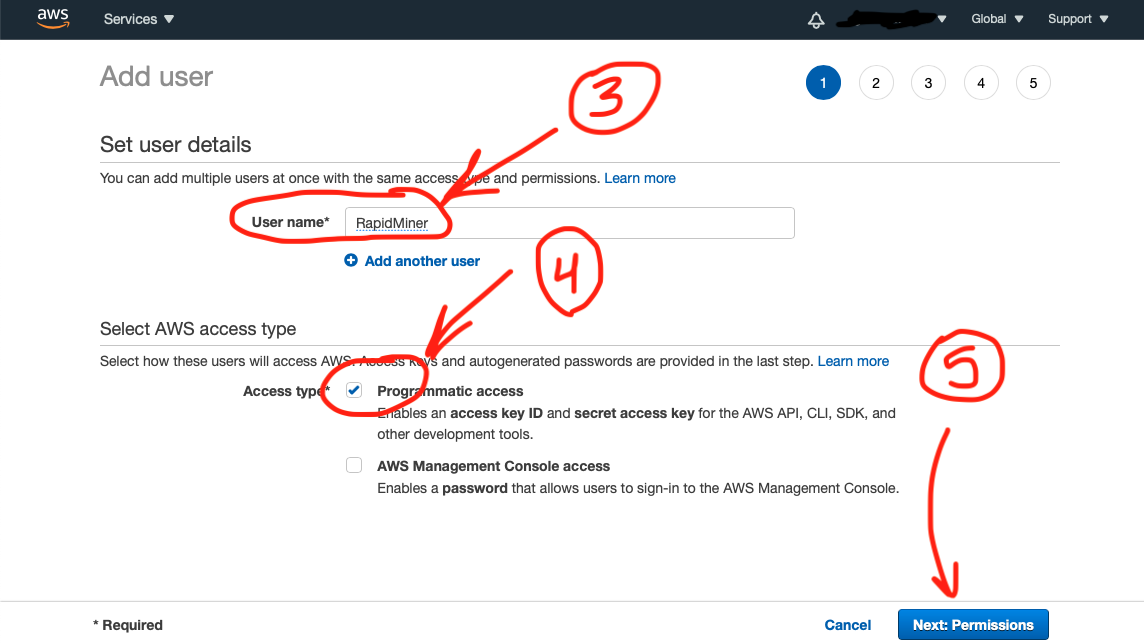
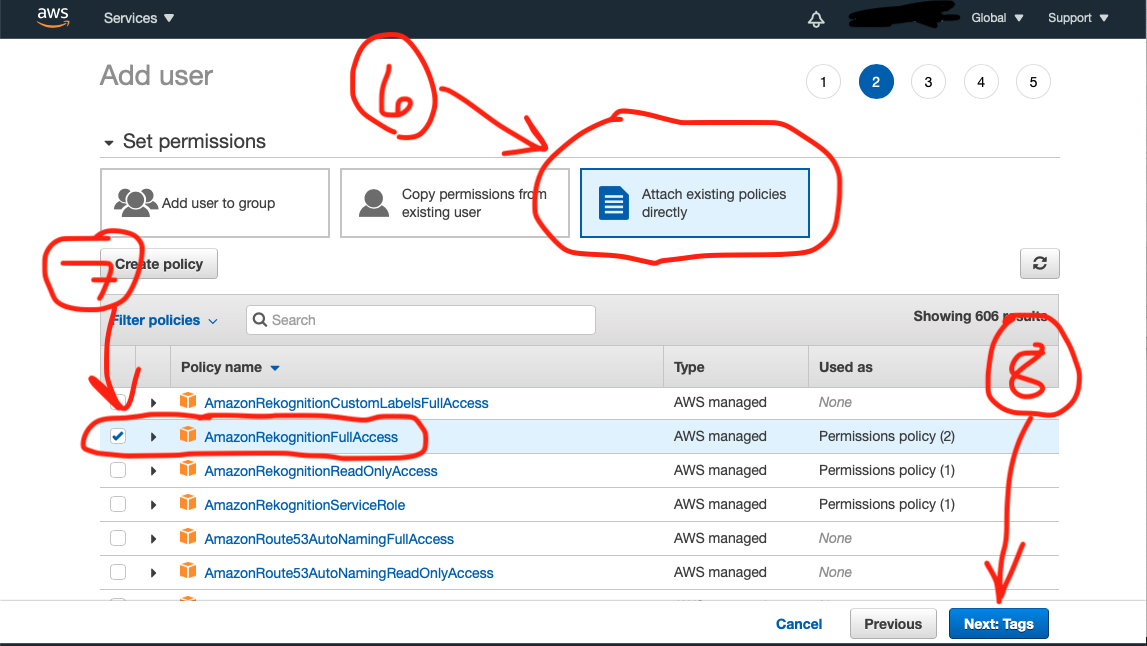
3. Go to Identity and Access Management (IAM) and create a new user for your RapidMiner tool.
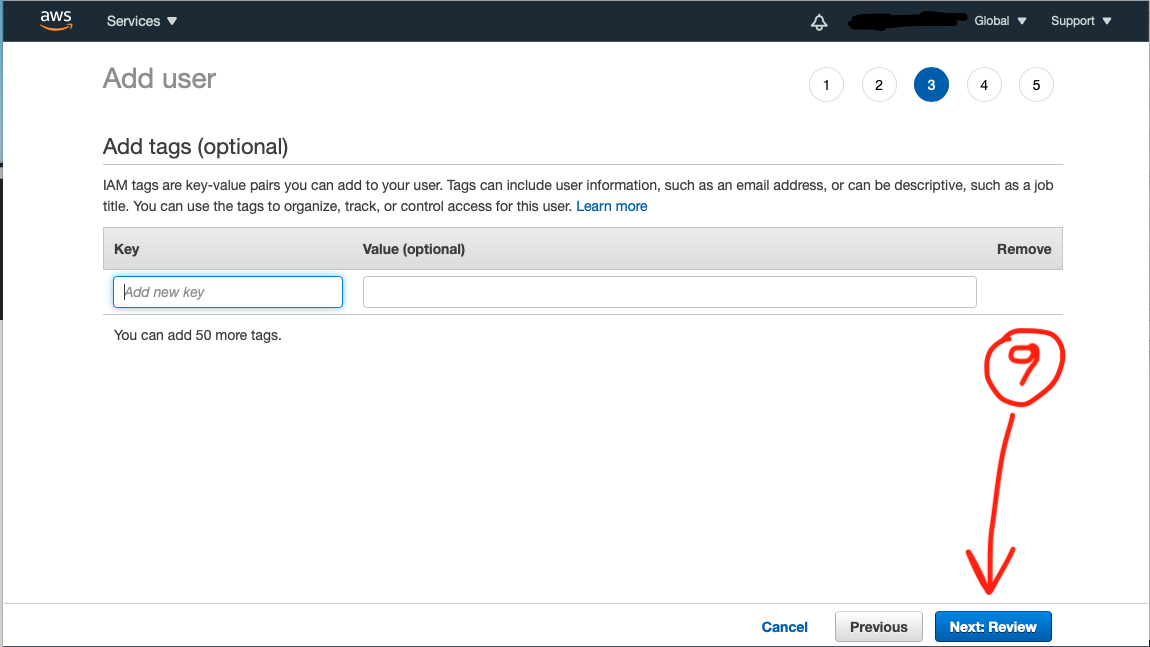
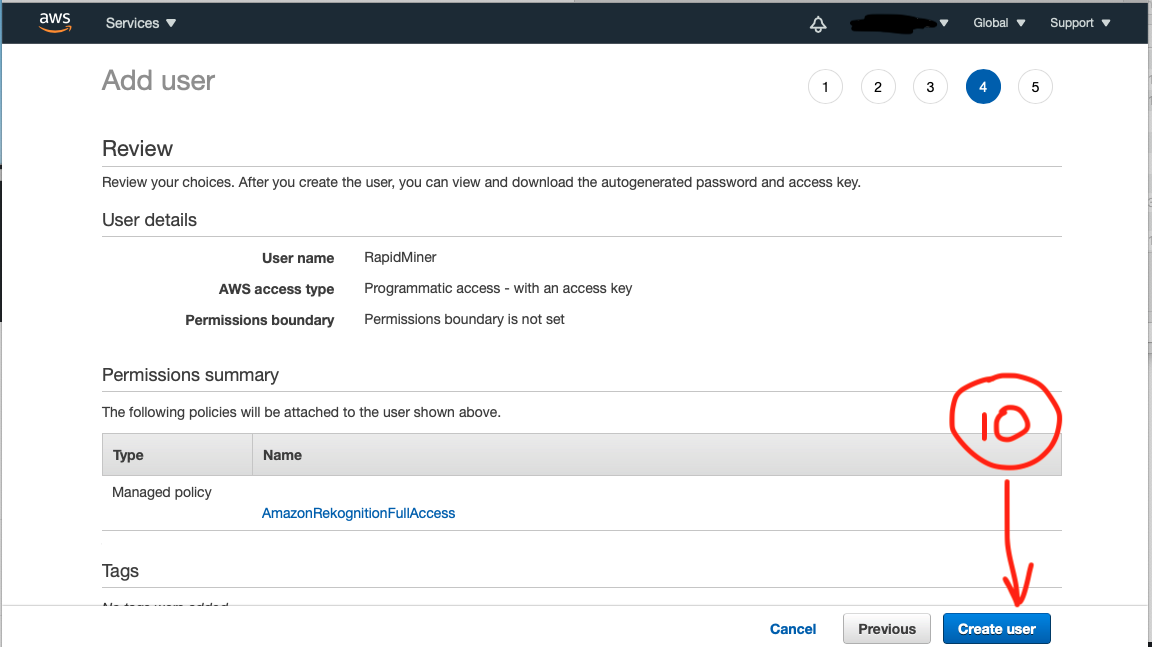
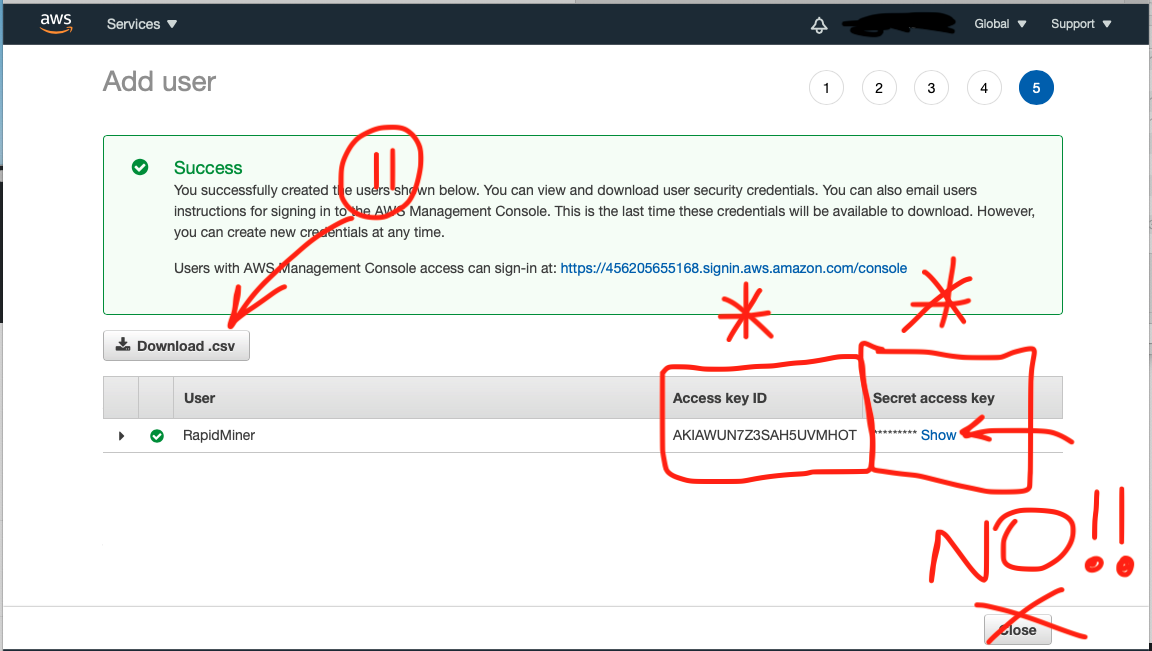
*****This last step is VERY IMPORTANT!! KEEP THIS SCREEN OPEN. You will need these Access and Secret Keys in just a few minutes. *****
2. Go to the top menu and select Extensions -> Marketplace
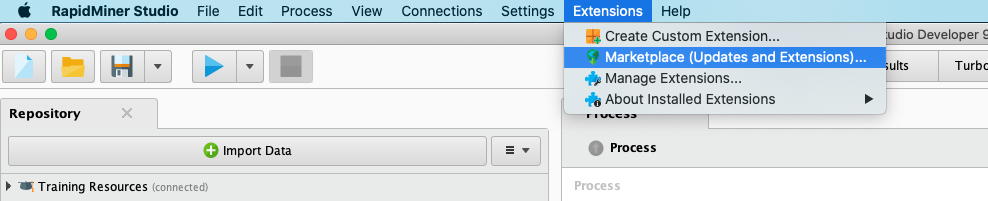
3. Search for "AWS Services". Click the checkbox for "Select for installation", accept the EULA, and restart RapidMiner Studio.
4. Go to the top menu and select Connections -> Create Connection

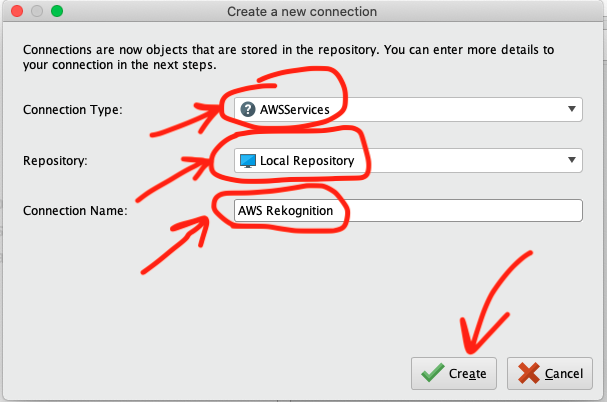
5. Choose "AWSServices", "Local Repository" and type "AWS Rekognition". Click "Create".
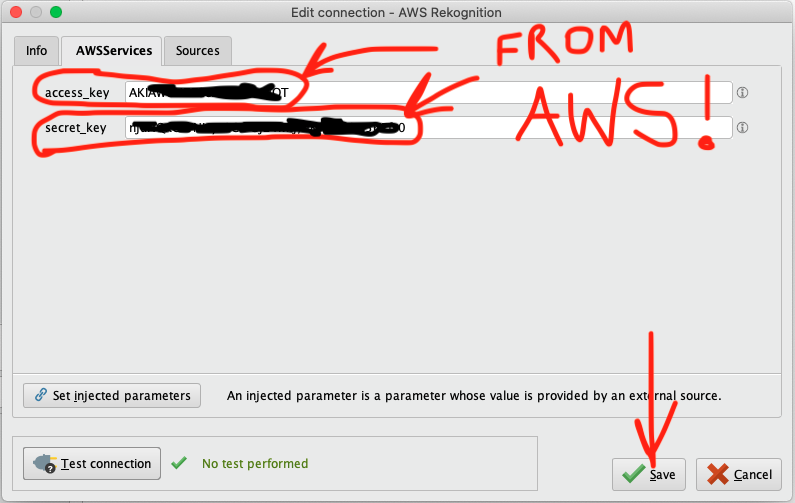
6. COPY and PASTE the Access and Secret keys from AWS into the boxes on this screen. Click "Save".
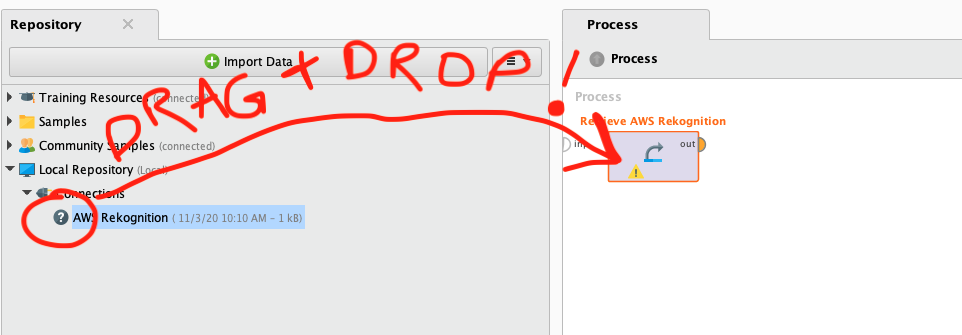
7. Drag and Drop this new "Connection" operator onto your Process panel.
8. Drag and Drop a "Compare Faces" operator onto your Process panel.
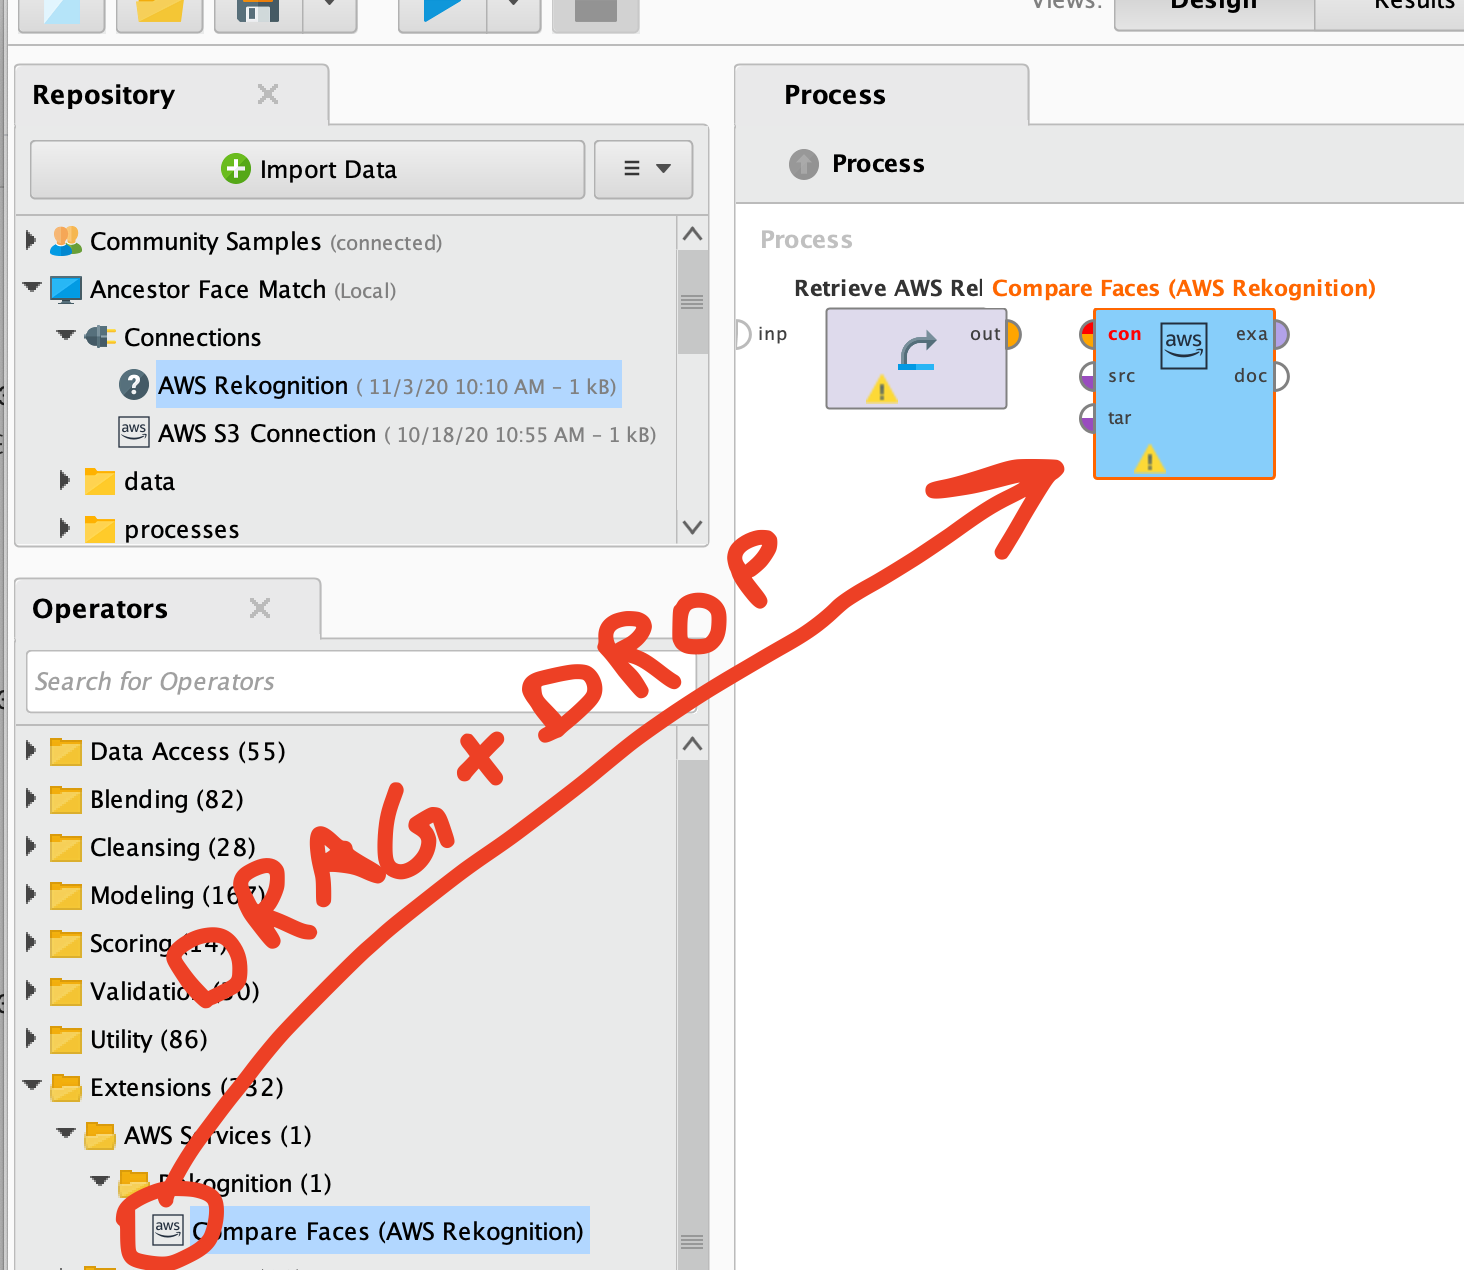
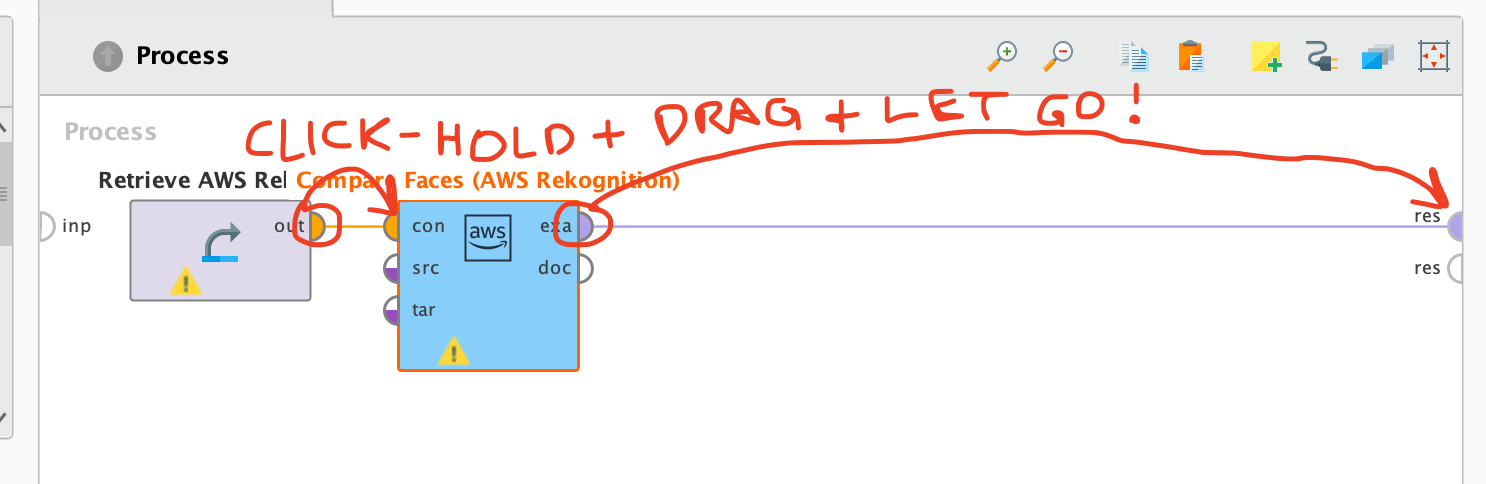
9. "Wire" up the two operators by clicking and dragging like this:
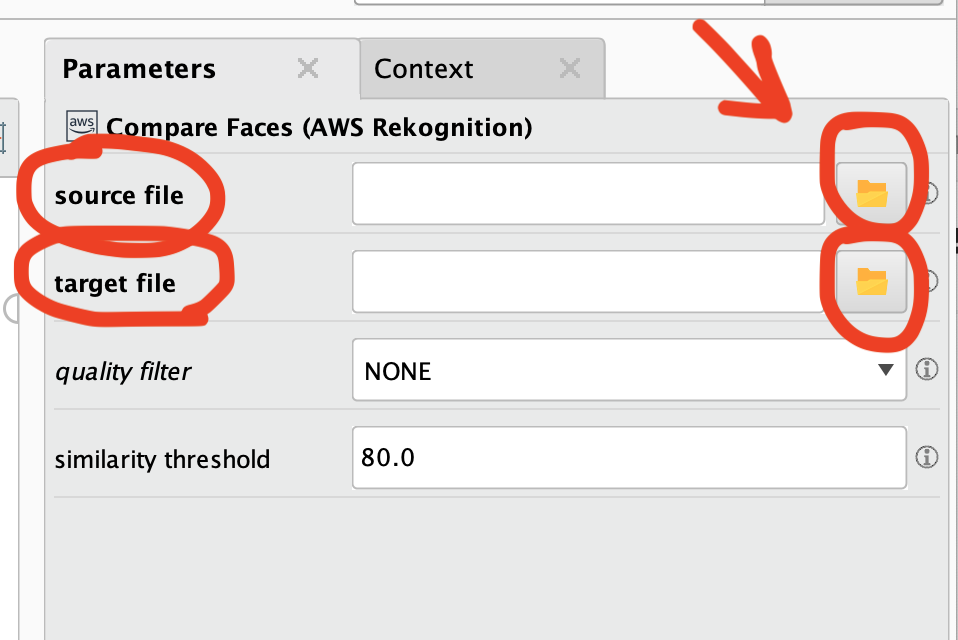
10. On the right side, select a file for your source image and another for your target image (it really doesn't matter which is which for most purposes).
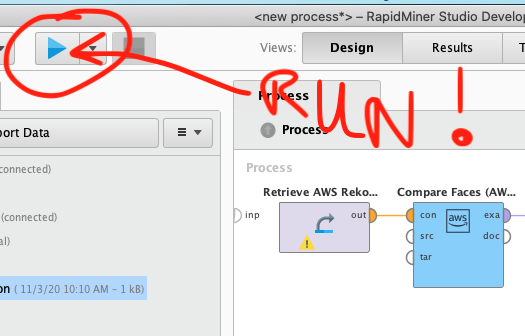
11. Click the RUN button on the top left.
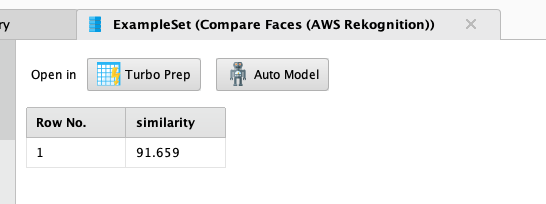
12. If all goes well, you will get a Similarity measure (from 0-100) as a result. That's it!

[NOTE: I strongly suggest at least doing a basic tutorial to get the basic idea of how the software works. There are Getting Started pages here.]
Part 1: Getting Started with AWS
1. Create an AWS Account. Full instructions are here. You will have to enter a payment method (credit card is preferred) but unless you do something really crazy, you will incur zero charges comparing a few faces using this method.2. Sign into your new AWS account.
[2a. I strongly recommend enabling two-factor authentication at this point for your own protection. You can learn how to do this here.]
3. Go to Identity and Access Management (IAM) and create a new user for your RapidMiner tool.
*****This last step is VERY IMPORTANT!! KEEP THIS SCREEN OPEN. You will need these Access and Secret Keys in just a few minutes. *****
Part 2: Getting Started with RapidMiner
1. Download and install RapidMiner Studio. The full instructions are here.2. Go to the top menu and select Extensions -> Marketplace
3. Search for "AWS Services". Click the checkbox for "Select for installation", accept the EULA, and restart RapidMiner Studio.
4. Go to the top menu and select Connections -> Create Connection
5. Choose "AWSServices", "Local Repository" and type "AWS Rekognition". Click "Create".
6. COPY and PASTE the Access and Secret keys from AWS into the boxes on this screen. Click "Save".
7. Drag and Drop this new "Connection" operator onto your Process panel.
8. Drag and Drop a "Compare Faces" operator onto your Process panel.
9. "Wire" up the two operators by clicking and dragging like this:
10. On the right side, select a file for your source image and another for your target image (it really doesn't matter which is which for most purposes).
11. Click the RUN button on the top left.
12. If all goes well, you will get a Similarity measure (from 0-100) as a result. That's it!

[NOTE: I strongly suggest at least doing a basic tutorial to get the basic idea of how the software works. There are Getting Started pages here.]
2

Comments
Lindon Ventures
Data Science Consulting from Certified RapidMiner Experts
If you send me an email I can reply back with a beta .jar file...
Scott
Dortmund, Germany
https://docs.google.com/document/d/1gNT9qeX_7WRfwOIoTDQJjW_quyQOYrPToDspsSYjauU/edit?usp=sharing
Anyone else got this, and a resolution?
Dortmund, Germany
did you fix your error problem? If yes how?
Thank you
Dortmund, Germany
Now Compare face working OK.
I am a person who reported this bug in email to Scott Genzer on December 9 and had email exchange with you and Scott.
Thank you again!
Dortmund, Germany